Getting Started Guide

Follow these simple steps to set up your live chat widget and start engaging with your customers in minutes.

1
Register
2
Create Site
3
Choose Plan
4
Install Widget
5
Start Chatting
1

Create Your Account

Sign up for Assistica AI to get started with your live chat solution

Registration Form
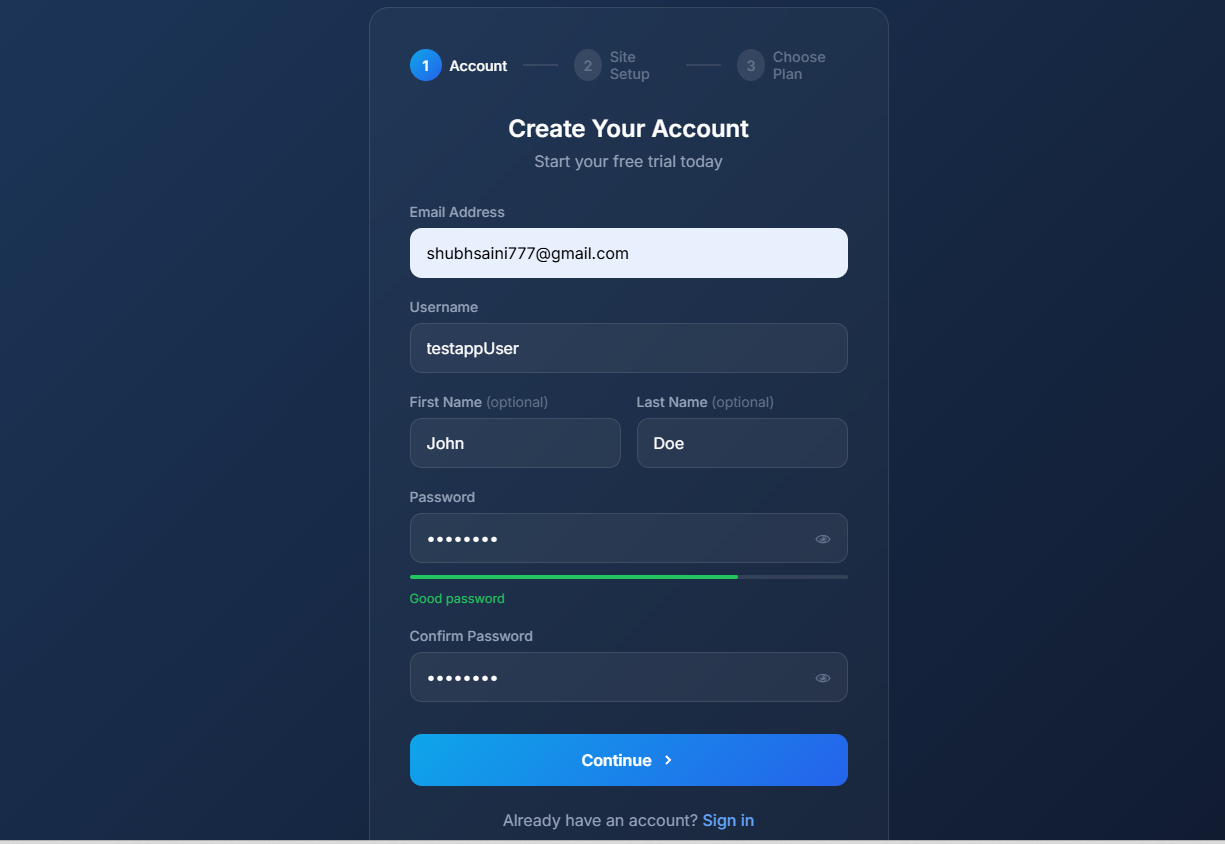
Registration Form Screenshot
  • 1
    Go to Registration Page Visit /register to create your account
  • 2
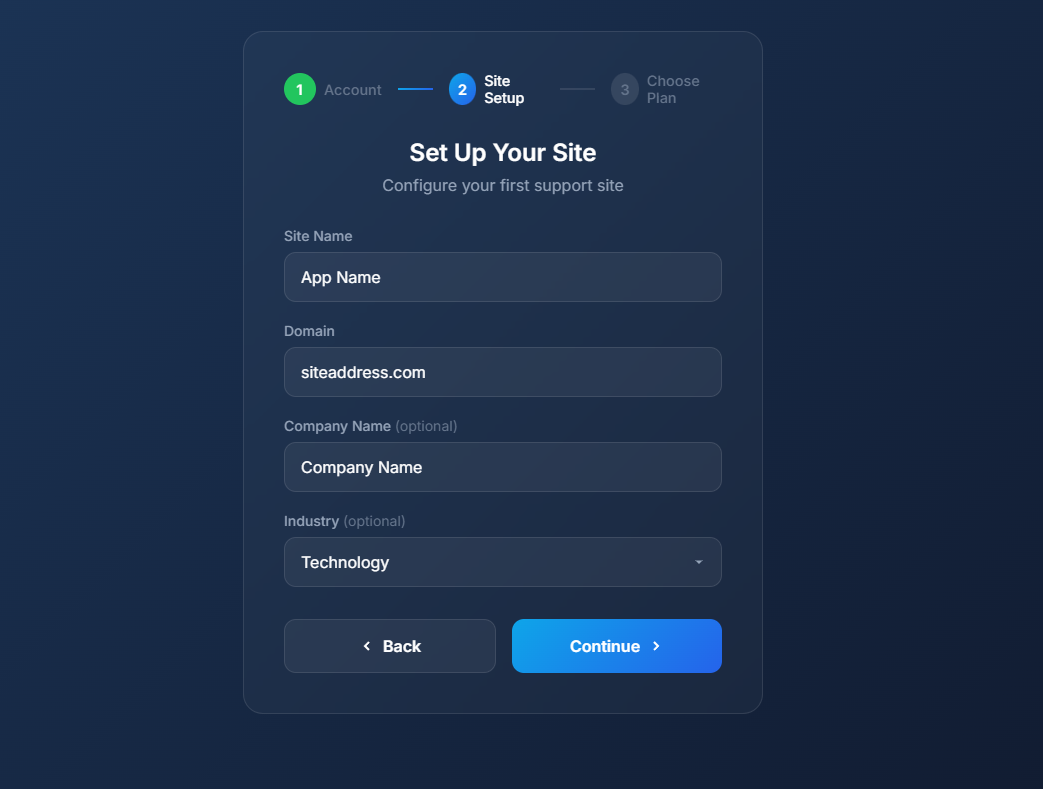
    Enter Your Details Provide your email address, choose a username, and create a secure password
  • 3
    Password Requirements Your password must be at least 8 characters with a mix of letters, numbers, and symbols
💡
Pro Tip

Use a business email address to help your team identify you in the support dashboard.

2

Set Up Your Site

Configure your website details where the chat widget will be installed

Site Setup Form
Site Setup Screenshot
  • 1
    Site Name Give your site a recognizable name (e.g., "My Online Store" or "Company Website")
  • 2
    Domain Enter your website domain (e.g., mywebsite.com) where the widget will appear
  • 3
    Company Details (Optional) Add your company name and industry to personalize your chat experience
3

Choose Your Plan

Select the plan that best fits your business needs

Plan Selection
Plan Selection Screenshot
  • Free Plan Perfect for trying out - includes 1 agent, 50 conversations/month, and basic features
  • Starter Plan ($29/month) Great for small teams - 3 agents, 500 conversations/month, and AI features
  • Pro Plan ($79/month) For growing businesses - 10 agents, unlimited messages, advanced analytics
💡
Start Free

You can start with the Free plan and upgrade anytime as your needs grow.

4

Install the Chat Widget

Add the widget code to your website to enable live chat

Widget Installation Code
Installation Code Screenshot
  • 1
    Go to Site Admin Dashboard After registration, you'll be redirected to your site admin panel
  • 2
    Find the Install Code Look for the "Install Code" or "Widget Code" section in the settings
  • 3
    Copy the Code Click the "Copy" button to copy the widget script to your clipboard

The installation code will look something like this:

<!-- Assistica AI Widget --> <script> (function(w, d, s, o, f, js, fjs) { w['ChatWidget'] = o; w[o] = w[o] || function() { (w[o].q = w[o].q || []).push(arguments); }; js = d.createElement(s); fjs = d.getElementsByTagName(s)[0]; js.id = o; js.src = f; js.async = 1; fjs.parentNode.insertBefore(js, fjs); }(window, document, 'script', 'chatapp', 'https://your-widget-url/widget.js')); chatapp('init', { siteId: 'your-site-id', apiKey: 'your-api-key' }); </script>
  • 4
    Paste Before </body> Tag Add the code just before the closing </body> tag on every page where you want the chat widget
⚠️
Important

Make sure to use your actual Site ID and API Key from the dashboard. The widget won't work without valid credentials.

5

Start Chatting with Customers

Use the support dashboard to respond to customer inquiries

Support Dashboard
Support Dashboard Screenshot
  • 1
    Access Support Dashboard Click "Open Support Panel" from your site admin to access the chat interface
  • 2
    View Conversations See all active and past conversations with your website visitors
  • 3
    Respond in Real-Time Click on any conversation to view messages and send replies instantly
  • 4
    Use AI Assistance Enable AI auto-reply to automatically respond when you're away
💡
Stay Connected

Keep the support dashboard open in a browser tab to receive real-time notifications when customers send messages.

+

Explore More Features

Get the most out of Assistica AI with these additional features

  • 🎨
    Customize Widget Appearance Change colors, position, and welcome messages to match your brand
  • 👥
    Add Team Members Invite agents to help manage customer conversations
  • 🤖
    Configure AI Responses Set up automatic AI-powered replies for common questions
  • 📊
    View Analytics Track conversation metrics, response times, and customer satisfaction
  • 📁
    File Sharing Exchange files and images with customers during conversations

Ready to Get Started?

Create your free account and start engaging with your customers today.

Create Free Account